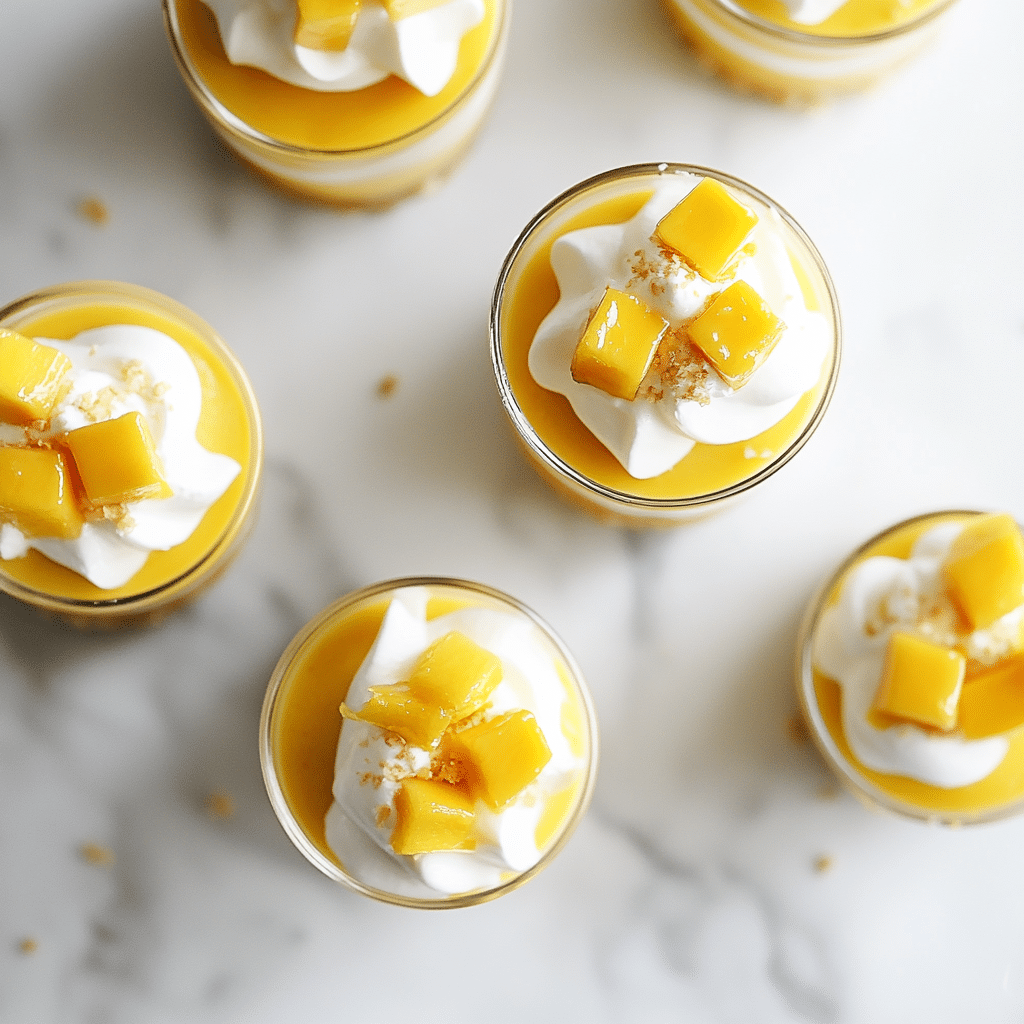
No Bake Mango Cheesecake Cups are the perfect answer to hot days and mango cravings. These creamy, fruity treats bring together the richness of cheesecake and the tropical sweetness of mango—no oven needed. Whether you’re planning a summer party, prepping an easy make-ahead dessert, or just need a mango fix, these chilled cups deliver flavor and elegance with minimal effort. In this guide, you’ll learn how to make them from scratch, how to adjust the filling, and whether you can skip the gelatin. Plus, I’ll share tips, tricks, and answers to common questions to help you make them perfectly every time.
In this post
Why These No Bake Mango Cheesecake Cups Mean So Much to Me
Growing up in Asheville, summer always brought sticky fingers, juicy mangoes, and no-bake desserts with my grandma. One of our favorites? Mango cheesecake—cold, creamy, and bursting with flavor. I remember sitting at her kitchen table while she blended mango pulp with cream cheese, layering it into mismatched glasses we’d collected over the years. Back then, it felt like mango magic.
These no bake mango cheesecake cups are a tribute to those memories. They’re everything I love in a dessert—cool, creamy, and easy to whip up. I especially love serving them in clear glasses so that gorgeous golden mango layer shines. Whether you’re prepping for a party or just craving something refreshing, these cups never disappoint.
For more fruity no-bake magic, you can also check out these No-Bake Upside-Down Mango Cheesecake or this super simple No-Bake Mango Cheesecake. Both are refreshing, quick, and kid-approved just like these no bake mango cheesecake cups!
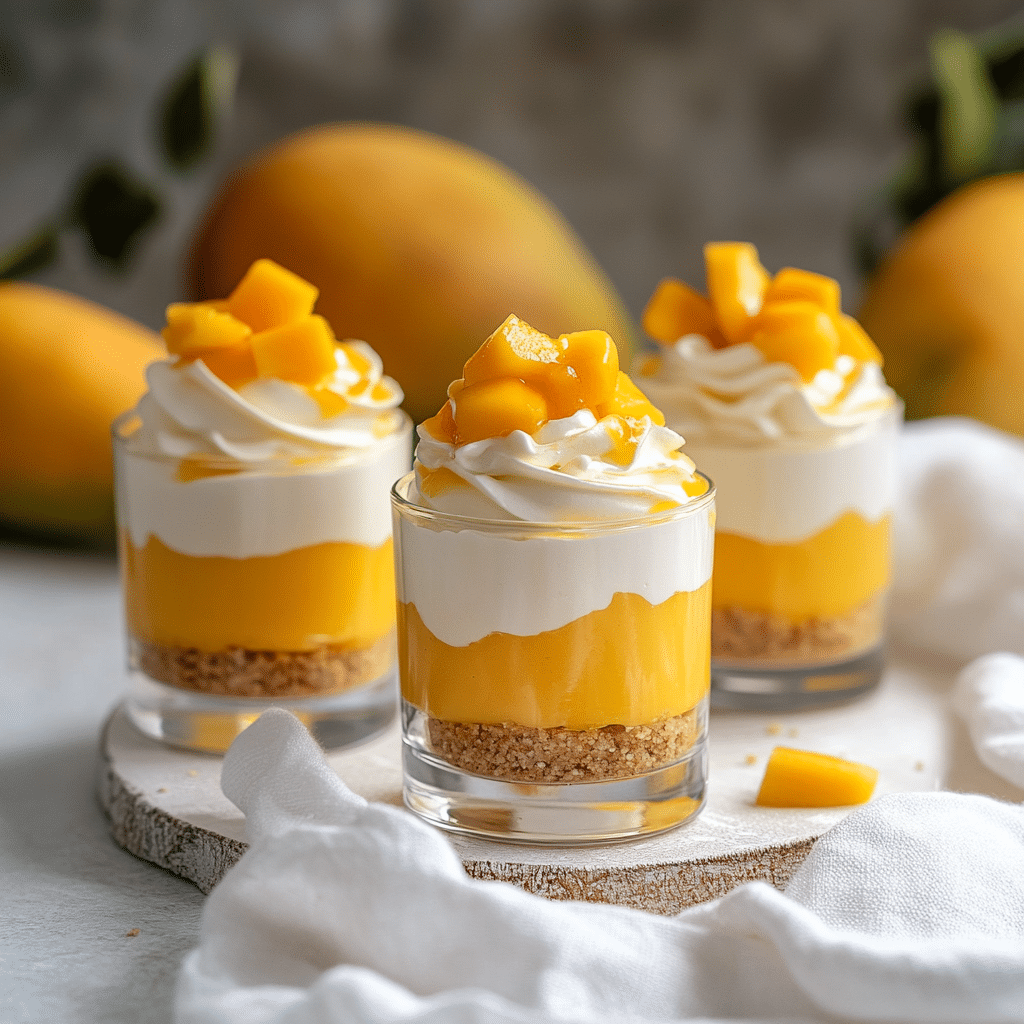
No Bake Mango Cheesecake Cups
Ingredients
Method
- Crush the cookies finely and mix with melted butter until it resembles wet sand.
- Spoon 2 tablespoons of crust mixture into each serving cup and press lightly. Refrigerate.
- In a small bowl, bloom gelatin in water for 5 minutes. Then microwave for 10 seconds until melted.
- In a mixing bowl, beat cream cheese, sugar, and vanilla until smooth.
- Add mango pulp and mix until well combined, then stir in the melted gelatin.
- Fold in the whipped cream gently using a spatula until combined.
- Spoon the filling over the chilled crust and smooth the tops.
- Refrigerate for at least 4–6 hours or overnight to set.
- Top with additional mango pulp, whipped cream, and mango cubes before serving.`),
Nutrition
Notes
Homemade mango pulp should be strained with no added water.
For a firmer set, increase gelatin to 1½ tsp or reduce mango pulp slightly.
Best served chilled and within 3 days.
Tried this recipe?
Let us know how it was!Build the Base and Creamy Filling for No Bake Mango Cheesecake Cups
The Perfect Crust to Support That Creamy Mango Goodness
The foundation of these no bake mango cheesecake cups is a buttery, golden crust that adds just enough crunch. I like using crushed Nilla wafers mixed with melted butter for a sweet, slightly vanilla base. It holds its shape without hardening too much. If you’re more of a crumb-layer lover, you can skip the butter and use dry crushed cookies instead—great for adding texture between filling layers.
You only need two ingredients:
- 1 ½ cups crushed Nilla wafers or graham crackers
- ¼ cup unsalted butter, melted
To prepare the crust:
- Crush the cookies finely using a food processor or by hand.
- Mix in the melted butter until evenly coated.
- Spoon 2 tablespoons of the mixture into each serving cup.
- Press down gently and refrigerate while you make the filling.
This base is super versatile—just like the crust I use in my No bake cottage cheese cheesecake, which are another sunny-weather hit.
Soft-Set Mango Cheesecake Filling: Creamy Without the Oven
No bake mango cheesecake cups shine with a smooth, creamy filling that balances sweet mango and rich cream cheese. But mango pulp can thin the texture, so we gently set it with a small amount of gelatin while keeping that mousse-like fluff.
You’ll need:
- 8 oz cream cheese, softened
- ¼ cup sugar
- 1 tsp vanilla
- ¾ cup mango pulp (Kesar or homemade)
- 1 tsp gelatin + 2 tbsp water
- ½ cup heavy cream, whipped
Steps:
- Bloom gelatin in water for 5 mins, then melt it briefly in the microwave.
- Beat cream cheese, sugar, and vanilla until smooth.
- Stir in mango pulp and melted gelatin.
- Fold in whipped cream gently.
- Divide over the crusts and chill 4–6 hours.
Want a firmer option? Try the whipped filling technique I use in my 3 ingredient no bake cottage cheese cheesecake, which holds its shape even better for parties.
Layering and Customizing No Bake Mango Cheesecake Cups
Add That Golden Mango Layer for Extra Flavor
Once your mango cheesecake filling has chilled and started to set, it’s time for my favorite part: the mango topping. This layer really makes these no bake mango cheesecake cups pop—both in color and taste. You only need a couple of tablespoons of mango pulp per cup. Just spoon it gently over the set filling, spreading it evenly.
If you’re using canned Kesar mango pulp, it has the perfect consistency. But if you’re using fresh mangoes, blend and strain them to make a smooth topping. No water, no extras—just pure mango. This top layer adds extra mango flavor and turns each cup into a bright, show-stopping dessert. Let the topping chill for 30–60 more minutes so it can slightly firm up.
Creative Toppings and Custom Cheesecake Cup Ideas
Decorating your no bake mango cheesecake cups is all about having fun. I usually pipe a small swirl of whipped cream on top and sprinkle with freshly chopped mango pieces. But you can go further—try toasted coconut flakes, crushed pistachios, or even a drizzle of passionfruit syrup for tropical flair.
Want even more mango? Add a layer of cubed fresh mango inside the cup between the crust and filling. Or gently mix mango chunks into the cheesecake filling itself for texture in every bite.
And if you’re making these for a gathering, try serving them in mini cups with spoons tucked in. They’re perfect for parties, just like my No Bake Cheesecake, which use the same make-ahead method.
This is also the stage where you can scale up or down. Use tiny 4oz jars for dainty bites, or tall glasses for dramatic layers. The beauty of these cups is how customizable they are.
Troubleshooting Texture in No Bake Mango Cheesecake Cups
Why Mango Cheesecake Fillings Can Be Tricky
Here’s the truth: no bake mango cheesecake cups are notoriously fussy when it comes to texture. If you’ve tried to make one before and ended up with a dessert that didn’t set, you’re not alone.
Mango pulp is thick and lush, but it also adds a lot of moisture—and that can stop your filling from setting properly. Some mangoes also contain enzymes that reduce gelatin’s effectiveness, especially in fresh pulp. That’s why many online recipes either use very little mango (which dulls the flavor), too much gelatin (which turns it jello-like), or white chocolate (which adds sweetness and masks the mango).
So what’s the solution? Make cups instead of a whole cheesecake. By serving them in individual portions, you’re not relying on the cheesecake to slice cleanly. It can stay soft, creamy, and mousse-like—exactly how I love it. You get structure, but also that melt-in-your-mouth feel.
Simple Adjustments to Get the Texture You Want
Depending on how firm or creamy you like your no bake mango cheesecake cups, you can adjust a few things:
- For a firmer texture, reduce the amount of mango pulp slightly and increase the gelatin to 1½ teaspoons.
- For a creamier finish, skip the gelatin entirely—but know the filling will be soft and spoonable.
- Want it richer? Swap out the whipped cream for sweetened condensed milk or coconut cream.
- To cut sweetness, use plain mango pulp (no added sugar) and add lemon juice for brightness.
As always, let the cups chill for a full 6 hours (or overnight) for best results. The longer they rest, the better the texture.
FAQs about No Bake Mango Cheesecake Cups
Can I Skip the Gelatin?
Yes, you can skip the gelatin in these no bake mango cheesecake cups, but it will change the texture significantly. Without gelatin, the filling will be much softer—almost like a thick mousse or mango cream. It will still taste amazing but won’t hold shape as well, even in cups. If you go this route, be sure to serve them well-chilled and straight from the fridge.
Can I Make My Own Mango Pulp?
Absolutely! If you have sweet, ripe mangoes, making your own pulp is easy and flavorful. Just peel and dice 2–3 mangoes, blend until smooth, and strain to remove any fibers. The key is not adding any water, so the pulp stays thick and flavorful. Homemade pulp gives these no bake mango cheesecake cups a fresh tropical edge. That said, Kesar canned pulp is consistent, richly colored, and a great option when mangoes aren’t in season.
Can I Add More Fresh Mango?
Yes—and please do! Fresh mango adds texture, sweetness, and visual appeal. I love folding small cubes into the cheesecake filling or adding a layer of chopped mango over the crust before spooning in the filling. You can also decorate the top with mango slices.
Can I Prepare These in Advance?
These no bake mango cheesecake cups are make-ahead friendly and even better when chilled overnight. You can prep the entire dessert (crust, filling, and mango topping) up to 2 days in advance. Just cover each cup with plastic wrap or a lid and store in the fridge until serving. This makes them perfect for parties, potlucks, or batch prepping for family dessert.
How to Store No Bake Mango Cheesecake Cups?
Store your assembled cups in the refrigerator, covered tightly. They’ll stay fresh for up to 3–4 days. Avoid freezing, as the texture can separate due to the high water content in the mango pulp and whipped cream. If you’re prepping in bulk, assemble the crust and filling first, refrigerate, and add the fresh mango and whipped topping just before serving for best presentation.
Conclusion
No bake mango cheesecake cups bring together everything I love about desserts: creamy texture, tropical flavor, and absolutely no oven required. Whether you’re making them for a summer get-together, prepping ahead for the week, or simply enjoying mango season to its fullest, these cups deliver a chilled, fruity treat that always gets compliments. With just a few basic ingredients, you can create something that looks elegant, tastes rich, and satisfies that mango craving perfectly.
Feel free to customize your version—add extra mango chunks, play with the crust, or layer with passionfruit for even more tropical flair. And remember, it’s okay if the filling isn’t perfectly firm. The charm of these cups is in their soft, spoonable goodness. They’re fun, forgiving, and flavorful.
Looking for more no bake inspiration? Don’t miss my oven-free favorites!
If you love easy, delicious no-bake recipes, follow No Bake Treats on Facebook for feel-good sweets and simple treats that keep things cool in the kitchen.
Discover more no-bake dessert inspiration on No Bake Treats on Pinterest—perfect for adding sweetness to your day without turning on the oven!
